How to mark daily attendance for a class
Mark a whole class present in one tap, change only the absentees, and save — then pull a month's attendance for the class as a spreadsheet.
What you'll do
- 1Open Attendance and pick the class and date.
- 2Mark everyone present with Mark All, then change the students who are not.
- 3Add a remark where one helps.
- 4Click Save Attendance.
- 5Use Monthly Report to see or export a month's attendance.
Marking a class takes about a minute: mark everyone present in one tap, then change only the students who are absent, late, on half day or on leave. Nothing is recorded until you click Save Attendance, so you can correct mistakes before saving.
Teachers can do the same from the teacher app on their phone. This guide follows the web dashboard.
Before you start
You need an account with permission to mark attendance — usually class teachers and the school admin. The class must already have students in it; see How to import students from a spreadsheet if it doesn't.
Any staff member with attendance permission can currently mark any class, not only their own. Restricting teachers to their assigned classes is on our roadmap.
Step 1 — Pick the class and date
Go to Attendance. The screen is titled Attendance Management and opens on the Daily Entry tab.
Choose the class from Class — it starts as Select a class. The Date defaults to today. Use the arrows either side of the date to step back or forward a day, or pick a date directly.
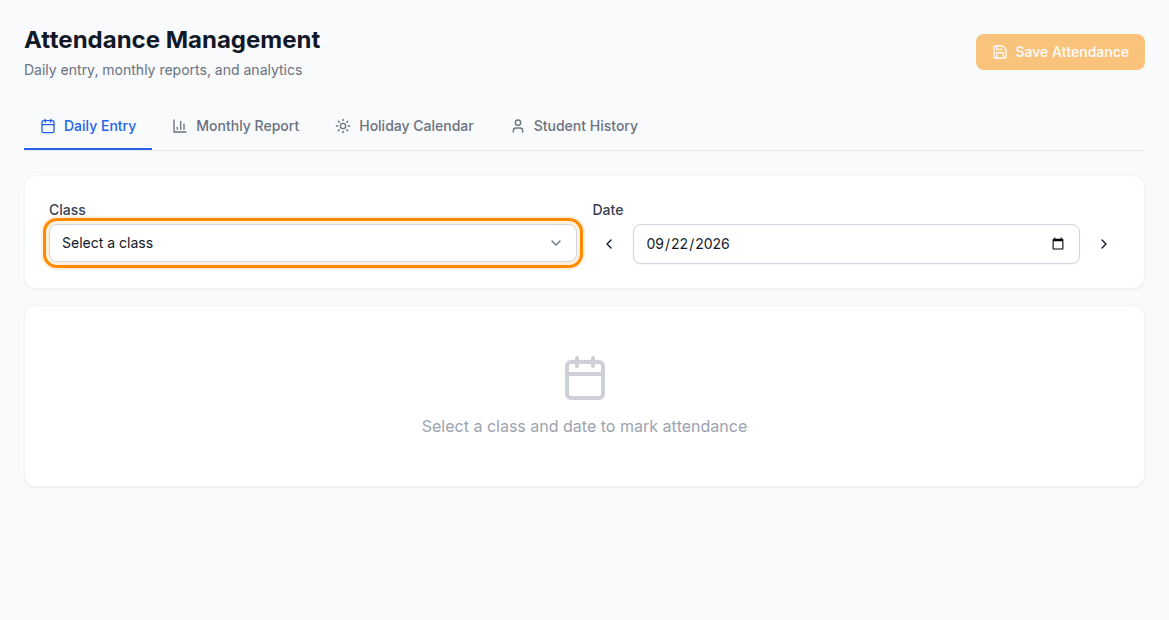
Once a class is chosen, its students appear with their roll numbers. A row that already has attendance saved for that date shows ✓ saved under the student's name.
Step 2 — Mark everyone present, then change the exceptions
Above the list is Mark All: with five options — Present, Absent, Late, Half Day and Leave. On a normal day, click Present.
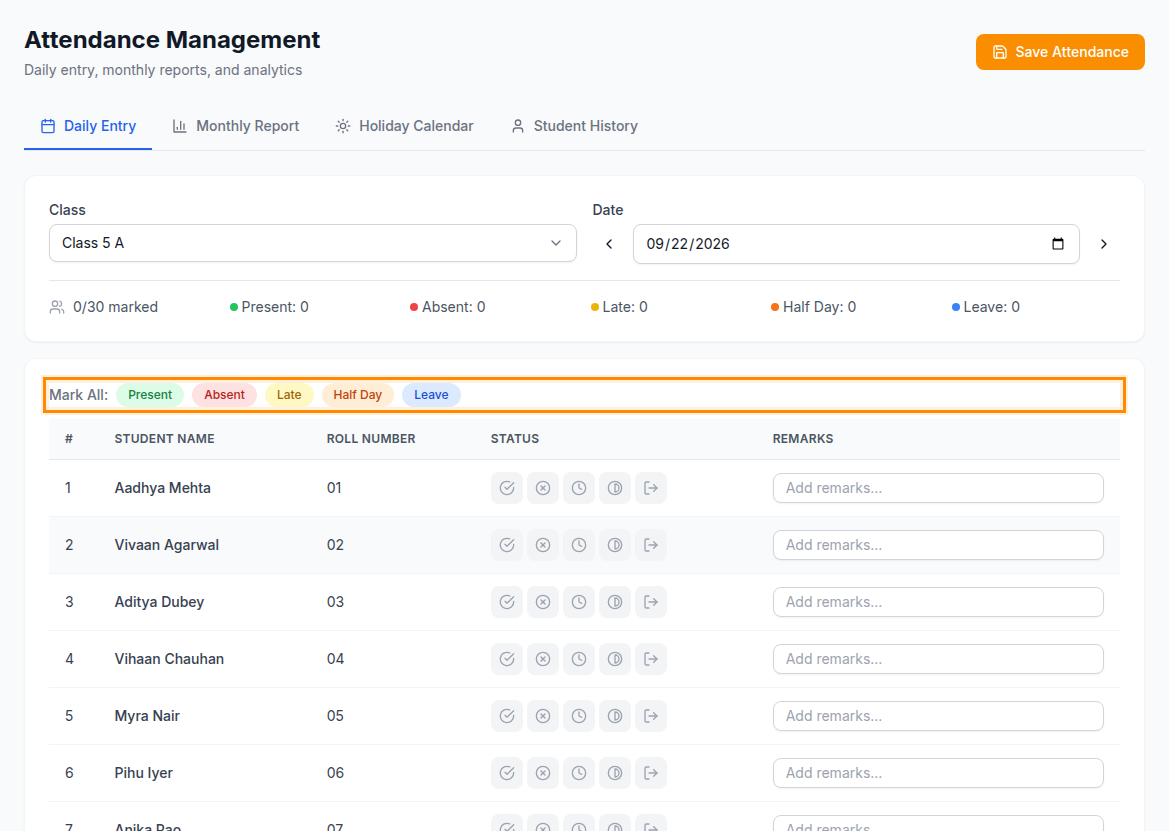
Then go down the list and change only the students who are not present. Each row has five buttons in the same order: present, absent, late, half day and leave. Hover over a button to see its name. The chosen one fills with colour.
To take a status off a student entirely, click the × that appears after the five buttons. That leaves the student unmarked for the day.
The summary above the list updates as you go — for example 30/30 marked, with a count for each status.
Step 3 — Add remarks where they help
Each row has an Add remarks... box. Use it for anything worth recording against that day — "left at 11 for a doctor's appointment", "arrived with parent". Remarks are saved with the attendance.
Step 4 — Save
Every row you change turns amber and shows ● unsaved, and the top of the screen counts them — 30 unsaved changes. Click Save Attendance.
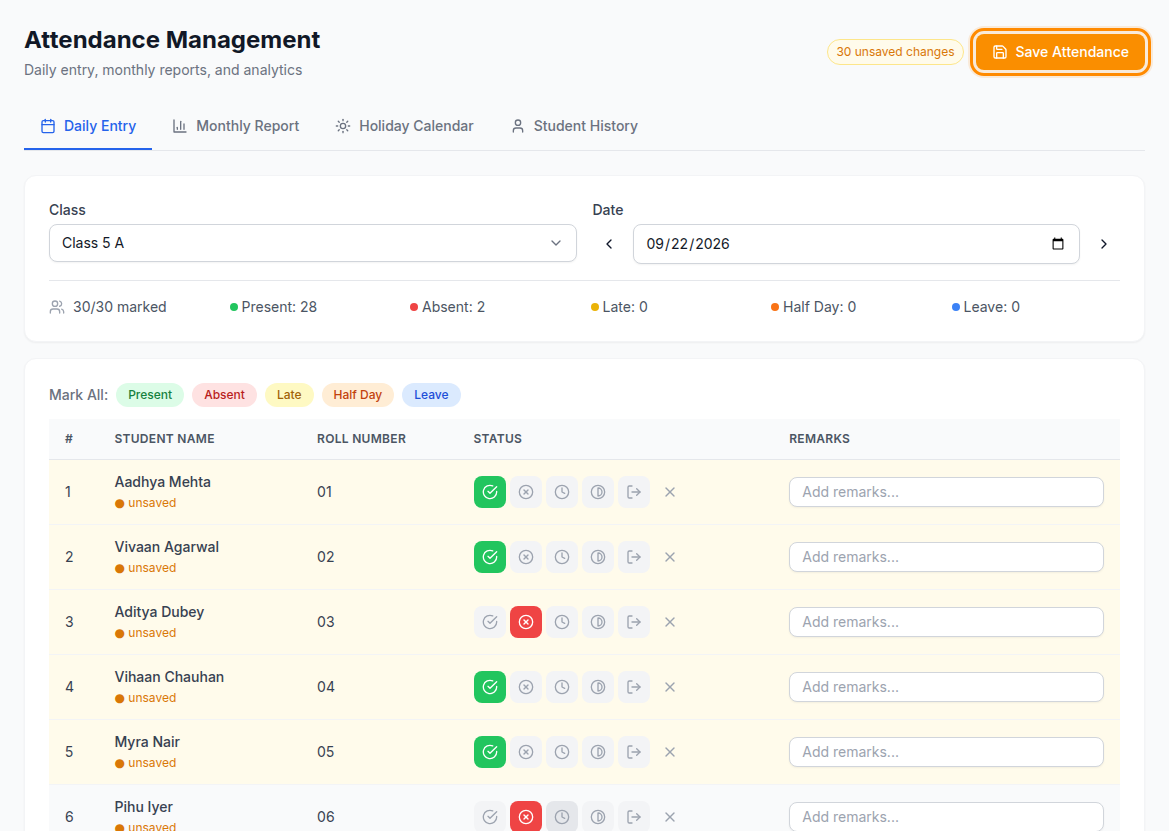
You'll see Attendance saved successfully!, and the rows switch back to ✓ saved.
Saving replaces that class's attendance for that date with what is on screen. To correct a mistake later, open the same class and date, change the student, and save again.
Parents see their own child's attendance and running percentage in the parent app. Saving attendance does not send parents a message.
If you switch to another class or date before saving, your unsaved changes for the previous one are discarded. Save first.
Holidays
Mark school holidays on the Holiday Calendar tab: pick the date, type the reason, and click Mark as Holiday. You can't save attendance for a date marked as a holiday.
Holidays do not yet change attendance percentages — a student's percentage is worked out from the days attendance was actually recorded. Excluding holidays automatically is on our roadmap.
Step 5 — See and export a month's attendance
Switch to the Monthly Report tab. With a class selected, pick the Month. The table lists each student with their present, absent, late, half-day and leave days, the total days recorded, and their percentage for the month.
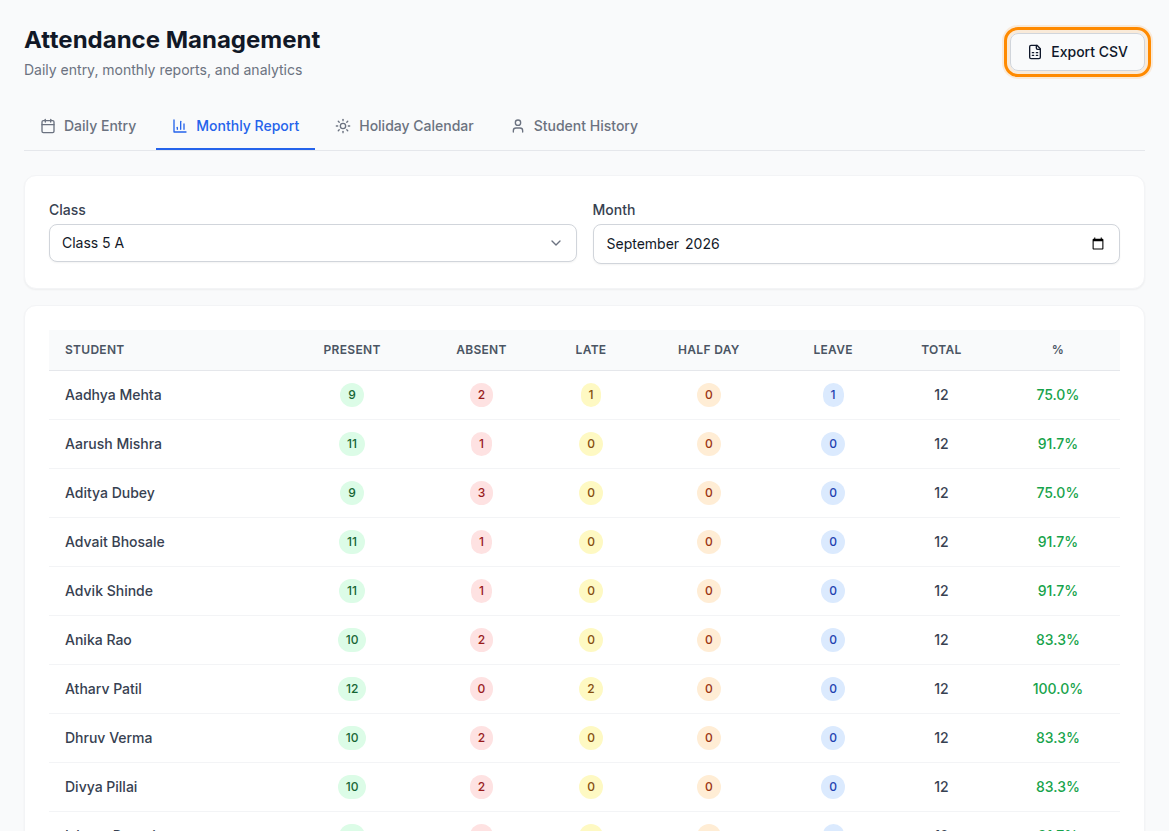
Click Export CSV to download the month as a spreadsheet. It has these columns:
| Column | What it holds |
|---|---|
| Student Name | The student's full name |
| Present, Absent, Late, Half Day, Leave | Days with that status in the month |
| Total Days | Days attendance was recorded for the student |
| Percentage | The student's attendance percentage for the month |
Export CSV stays greyed out until the selected class and month have attendance saved.
To look at one student day by day, use the Student History tab: choose the student under Select Student and the Month, and you'll see each date's status and remarks.
Common problems
"This date is marked as a holiday — attendance cannot be recorded." The date is on the Holiday Calendar. Check the date, or remove the holiday from the Holiday Calendar tab if it was marked by mistake.
"Failed to save attendance." The save didn't reach the server — usually a dropped connection. Your changes are still on screen; click Save Attendance again.
The class list is empty. The class has no students yet, or the students are in a different class. Check under Students with the class filter.
Save Attendance is greyed out. No class is selected. Choose one from Class first.
Features covered
Attendance
Teachers mark daily attendance per class — present, absent, late, half-day, on leave — from the web or the mobile app. Running attendance percentages are kept per student, and parents can check their own child's record.
Mobile Apps (Android & iOS)
Native apps for teachers and parents. Teachers mark attendance, enter marks, post homework and lesson plans, and approve leave, appointment and complaint requests. Parents follow their child's attendance, results, homework, timetable and fees, receive push notifications, and pay fees online. Users choose their school from a list or type its school code, so one app serves every school on the platform — and a school that wants its own branded listing can have a build locked to it instead.
Want us to set this up with you?
Data migration and staff training are included on every plan.
Talk to us