How to create an exam and enter marks
Set up an exam, decide how each subject is marked, and get your teachers entering marks in one place — instead of a pile of paper mark-sheets.
What you'll do
- 1Create the exam — Unit Test, Half-Yearly, whatever your school calls it.
- 2Assign the classes that are sitting it.
- 3Set marking overrides only where a class or subject needs different marks than the default.
- 4Teachers enter marks by exam, class and subject.
- 5Publish the exam once every subject is entered.
An exam in the system has three parts: the exam itself (a name and dates), which classes are sitting it, and how each subject is marked. Most of that third part is already handled if you've set up Marking setup on the Subjects page — this exam-setup screen is only for the classes or subjects that need something different from your school-wide default.
Budget most of the twenty minutes here on the first exam of the year — a Half-Yearly or Annual you duplicate later takes a fraction of the time.
Before you start
Your classes, subjects, and the students in them need to exist already — this screen assigns and configures, it doesn't create any of those. If you haven't set your school-wide marking scheme yet, open Subjects, pick a subject and fill in its Marking setup; every exam you create afterwards starts from it automatically.
Step 1 — Create the exam
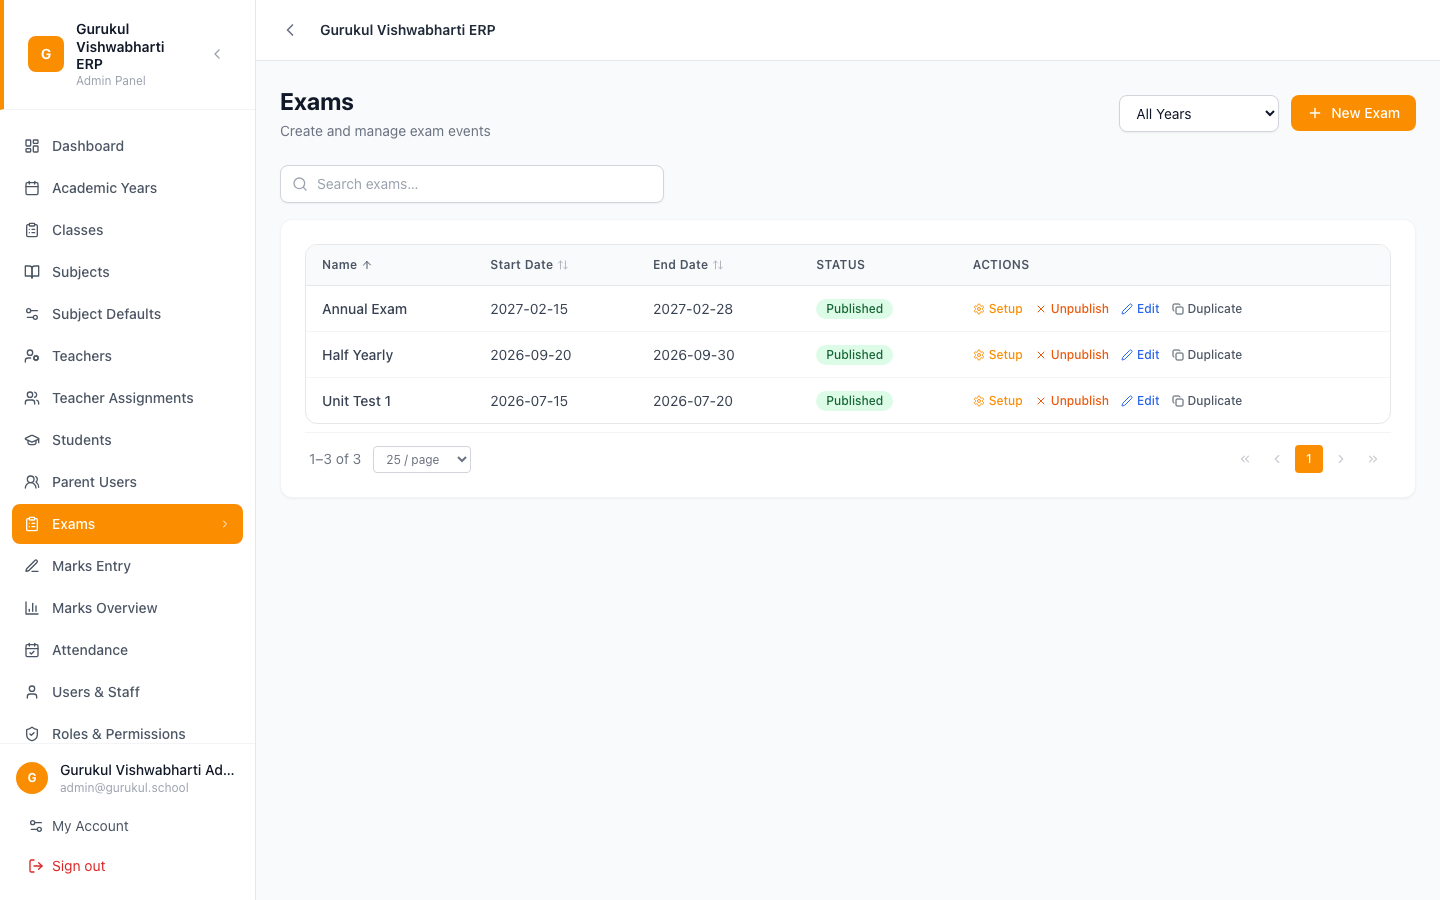
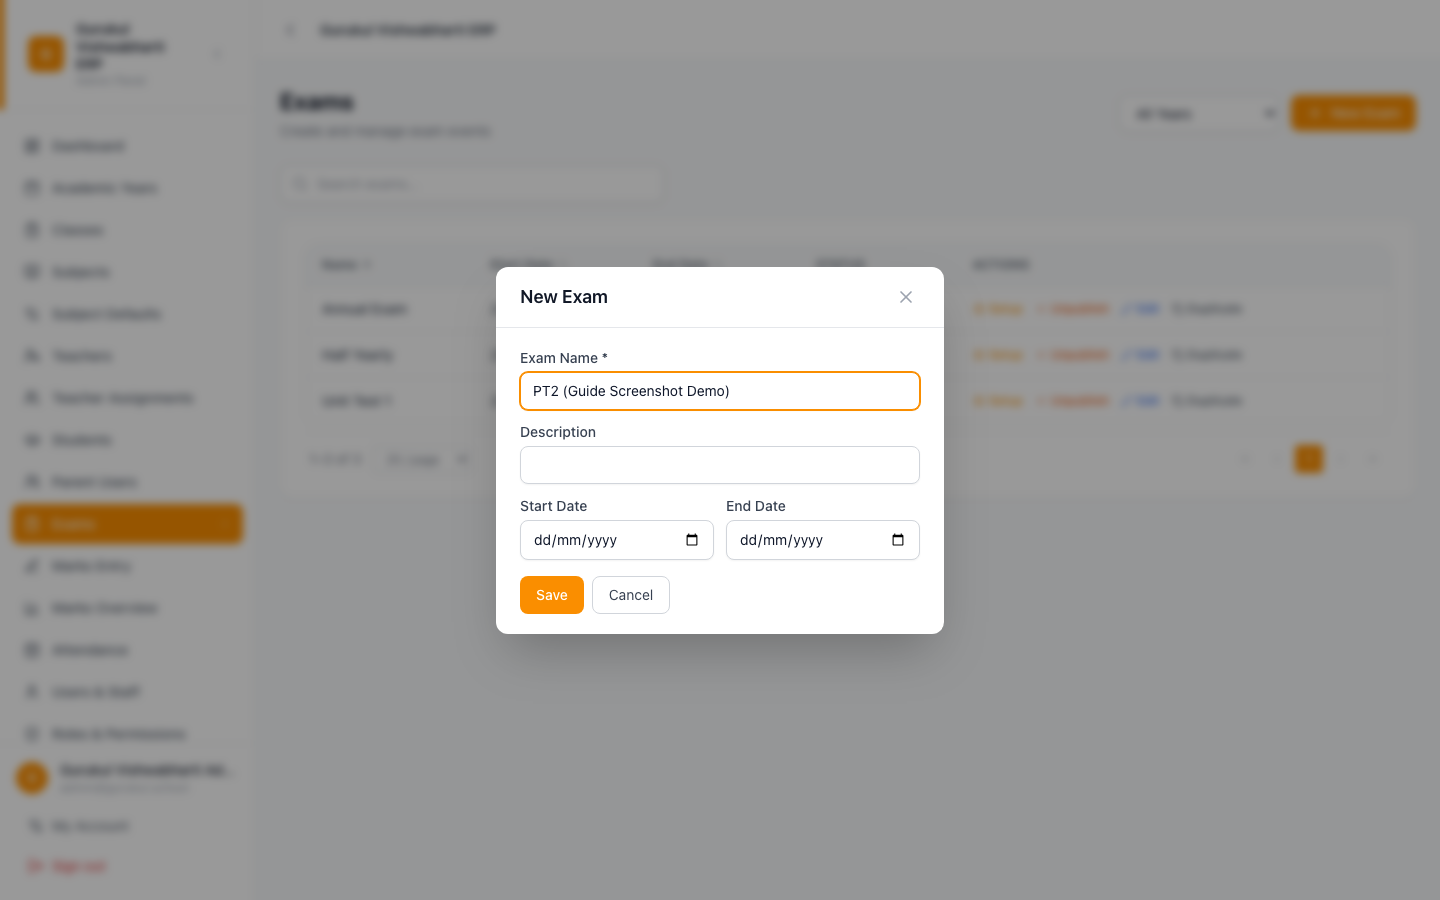
Go to Exams and click New Exam. Fill in:
- Exam Name — required, at least 2 characters. "Unit Test 1", "Half Yearly", "Annual Exam" — whatever your school actually calls it.
- Description — optional.
- Start Date / End Date — optional.
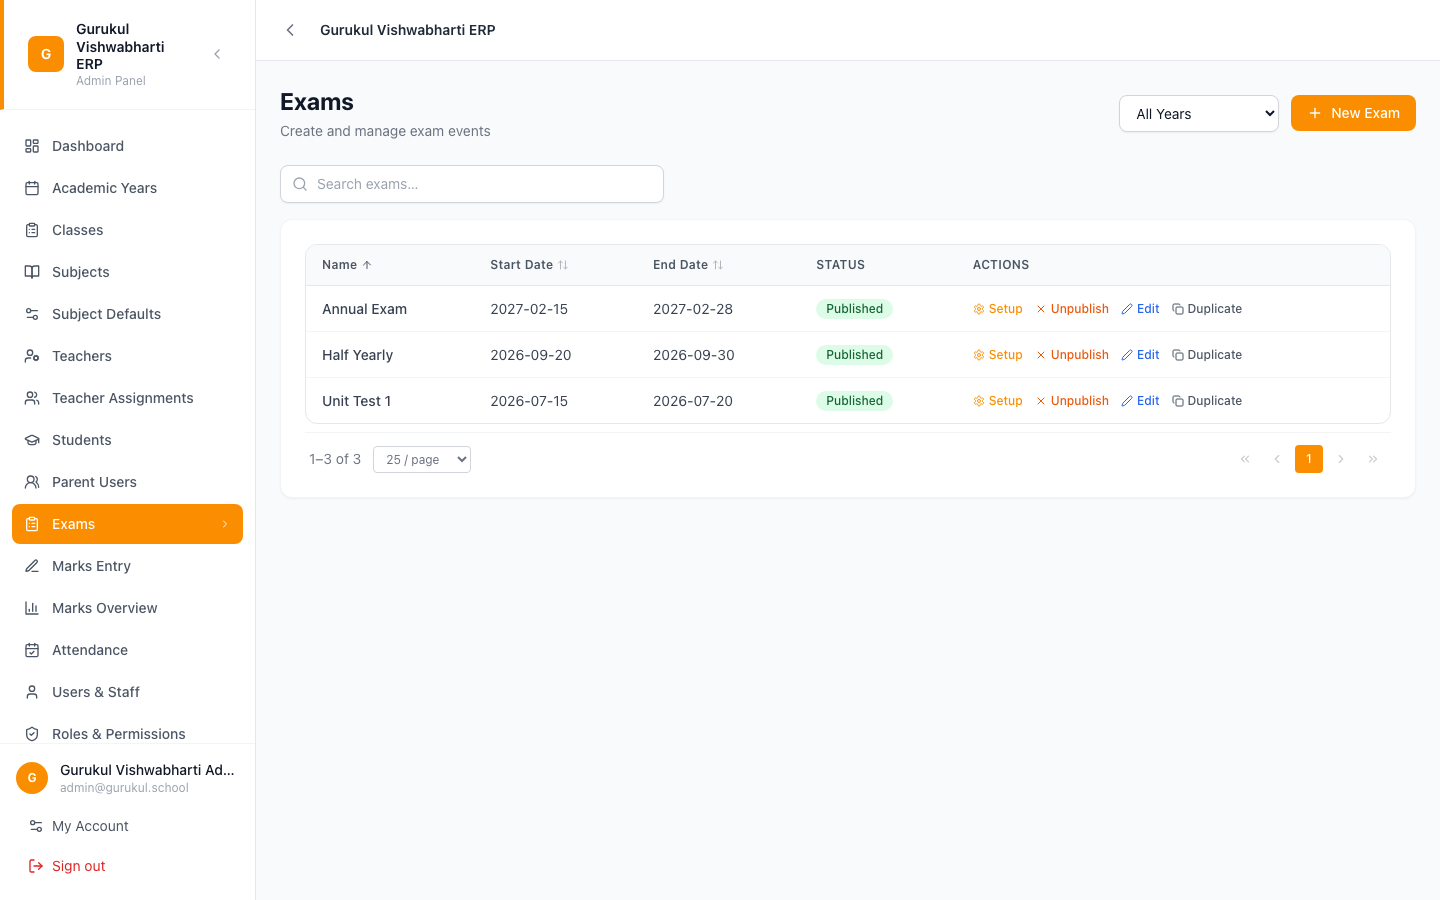
Save. The exam is created as a Draft — nothing is visible to parents or students yet, and nothing about it can be seen outside the admin screens until you publish it in Step 5.
Step 2 — Assign classes
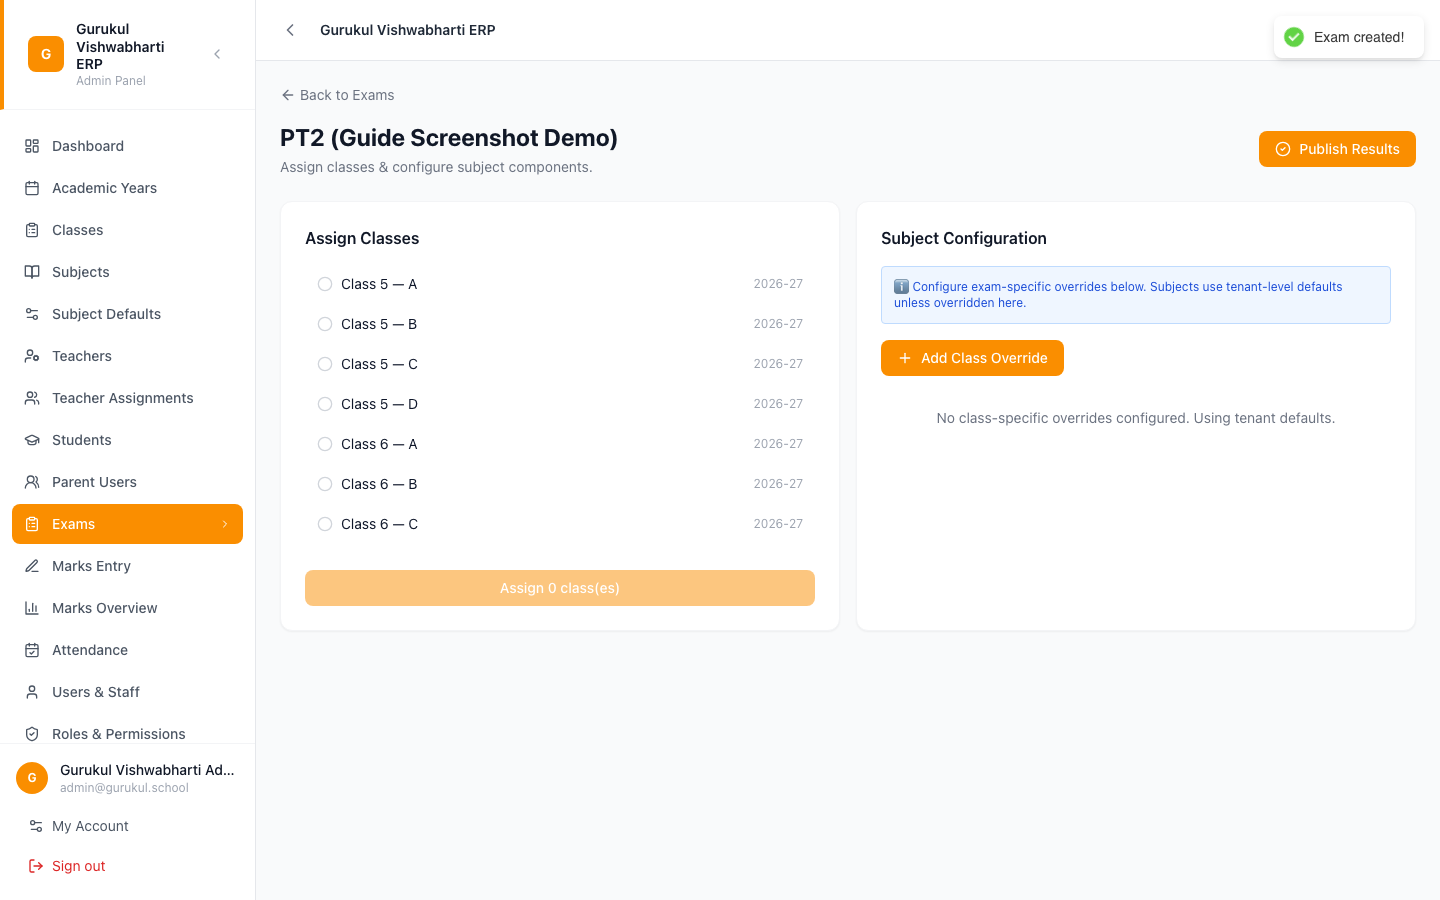
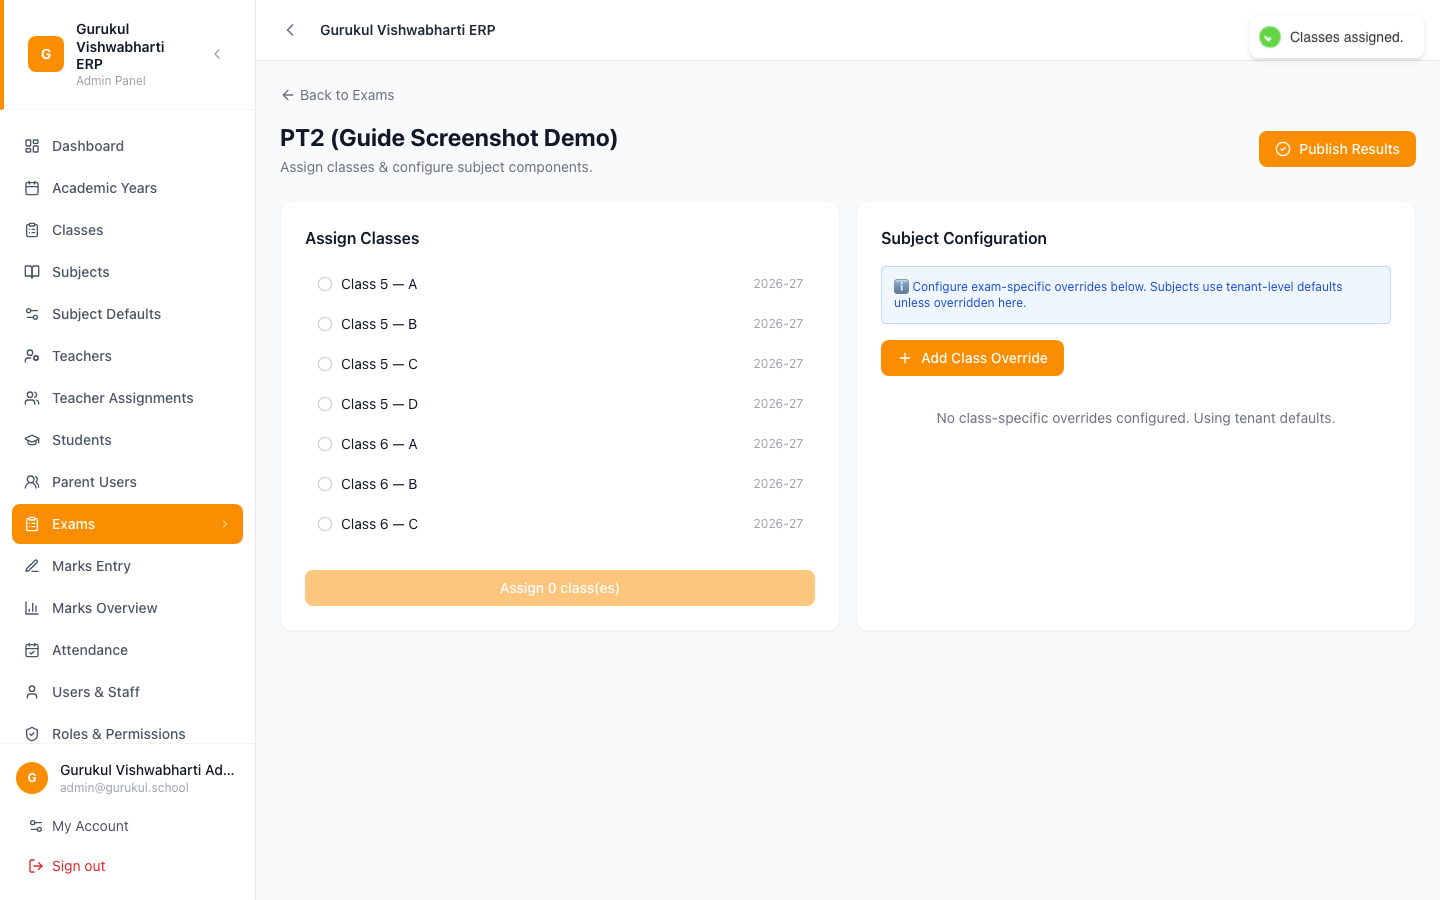
Click Setup next to the exam you just created. On the left, tick every class sitting this exam, then click Assign N class(es).
This step matters beyond bookkeeping: only students in an assigned class will have a row to enter marks against in Step 4.
Step 3 — Change marking for this exam (only where needed)
Open the exam and go to its Setup tab. Each subject has one row showing its max marks, pass marks, how the total splits, and where that setting comes from: School default (the Marking setup on the Subjects page), This exam, or This class only. A subject with no setting yet shows Set up instead, and teachers can't enter its marks until someone does.
You only need to touch a row if something about this exam differs from your school default — a unit test that's out of 20 instead of 100, say. Click Edit on the subject, then choose whether the change applies to All classes in the exam or to one class only. To give every subject the same marks at once, use Same for every subject….
Set the Max marks, Pass marks and the parts the total splits into, for example Theory 70, Practical 20, IA 10. Pick one of the presets or add and remove parts yourself. Two rules apply before you can save: the parts must add up to the max marks, and pass marks can't be more than the max marks. Both are shown on screen instead of being silently accepted.
A subject marked Different in N classes has a class-specific setting that wins over the all-classes one. A published exam is locked: unpublish it first if you need to change its setup.
Step 4 — Teachers enter marks
Teachers (or admins) go to Marks Entry and pick Exam, Class, then Subject — the subject list only appears once a class is chosen. What a teacher sees here depends on their Teacher Assignments: a teacher only sees classes and subjects they're actually assigned to, unless they're a class teacher and your school has turned on class teachers entering marks for every subject in their class.
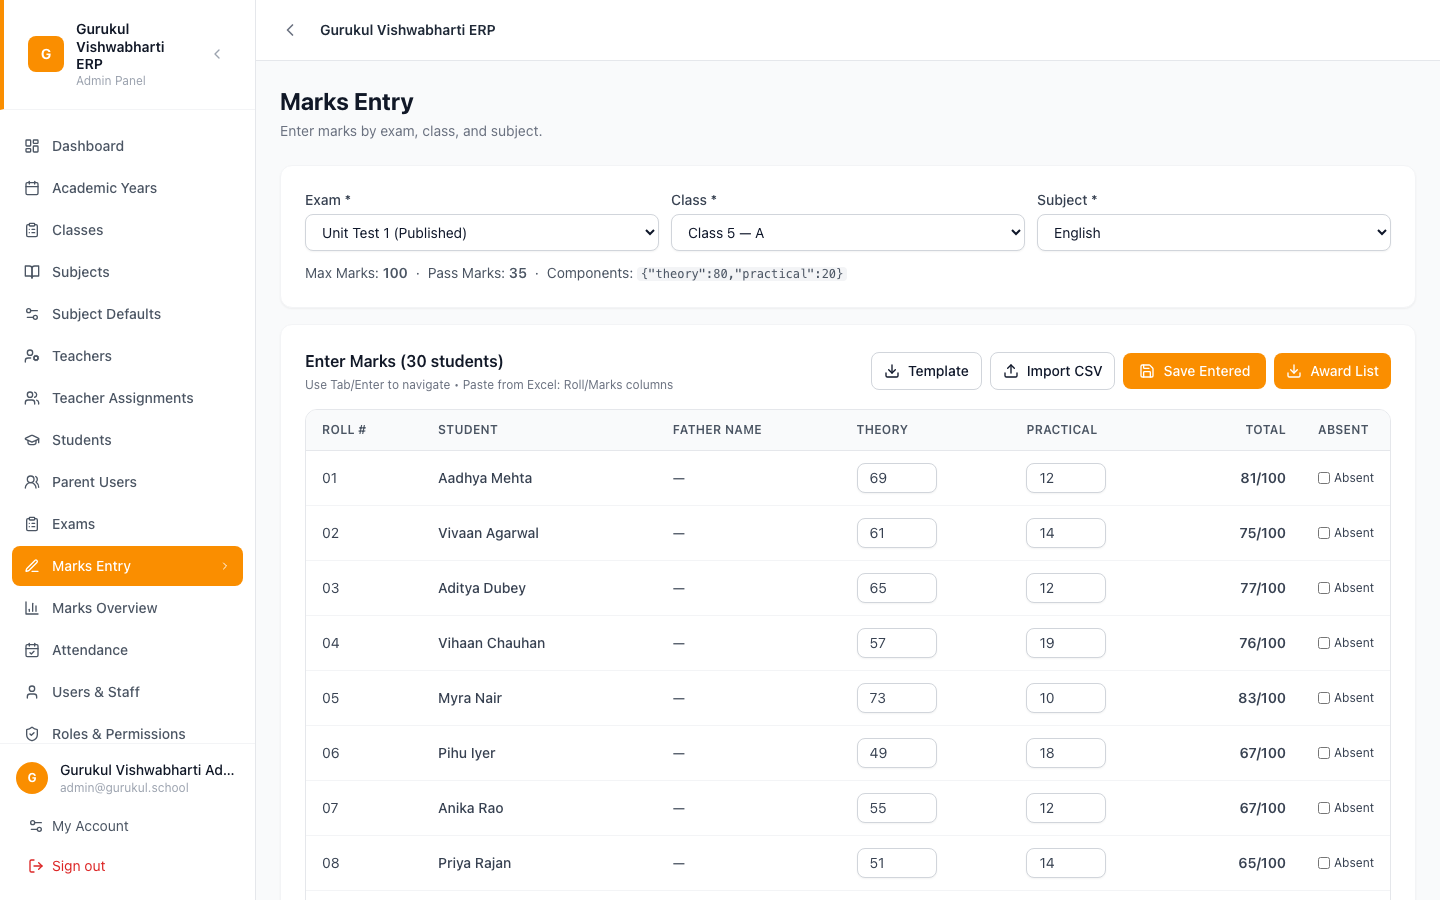
Once all three are picked, every student who takes that subject appears in one table, sorted by roll number, with one input box per component (matching whatever you configured in Step 3 — theory/practical/internal, or a single box if there's no split). A running Total column updates as you type.
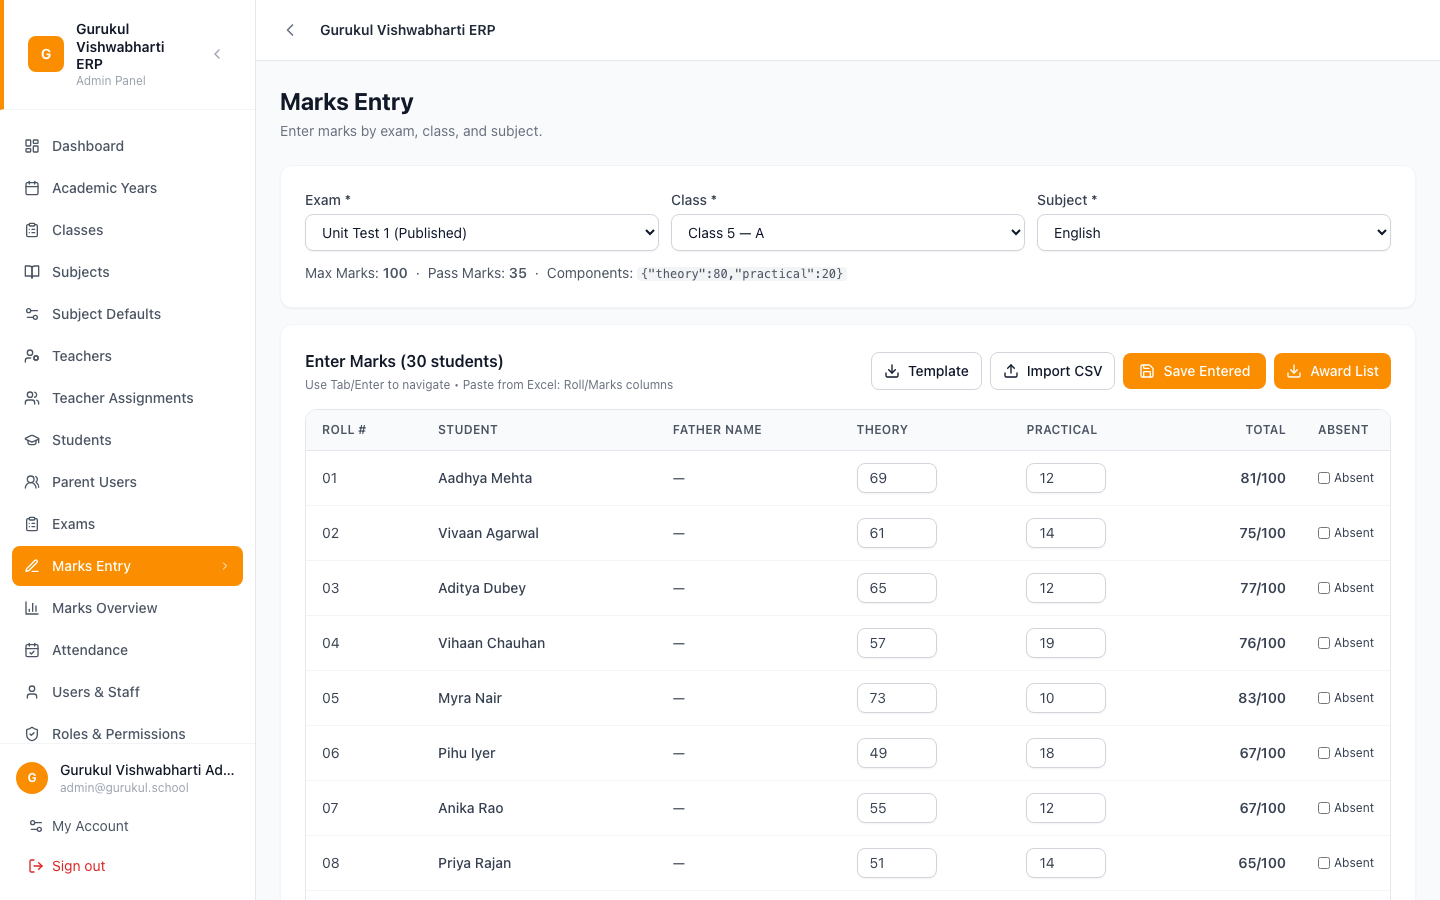
For a compulsory subject that is the whole class. A subject that only some students take is an elective: its entry in the subject list is tagged (elective) and the table lists only the students enrolled in it. If nobody is enrolled yet, you see No students are enrolled in this elective, with a Choose who takes it link for anyone allowed to edit students. Marks for a student who isn't enrolled are refused when you save. To choose who takes an elective, open Classes, open the class and go to its Electives tab, tick the students under each elective, then Review and save.
Three ways to fill it in fast, beyond typing cell by cell:
- Tab and Enter move between boxes without touching the mouse.
- Paste directly from Excel — copy a two-column roll number/marks range and paste into the table; it matches by roll number or name automatically.
- Download Template, fill it in a spreadsheet, and Import CSV — the file needs a
roll_numbercolumn and a column with "marks" or "score" in its name.
Mark a student Absent with the checkbox in that row — this excludes them from the marks columns (they show "AB") without needing a zero entered. Trying to enter a mark higher than a component's maximum is rejected immediately with the limit shown.
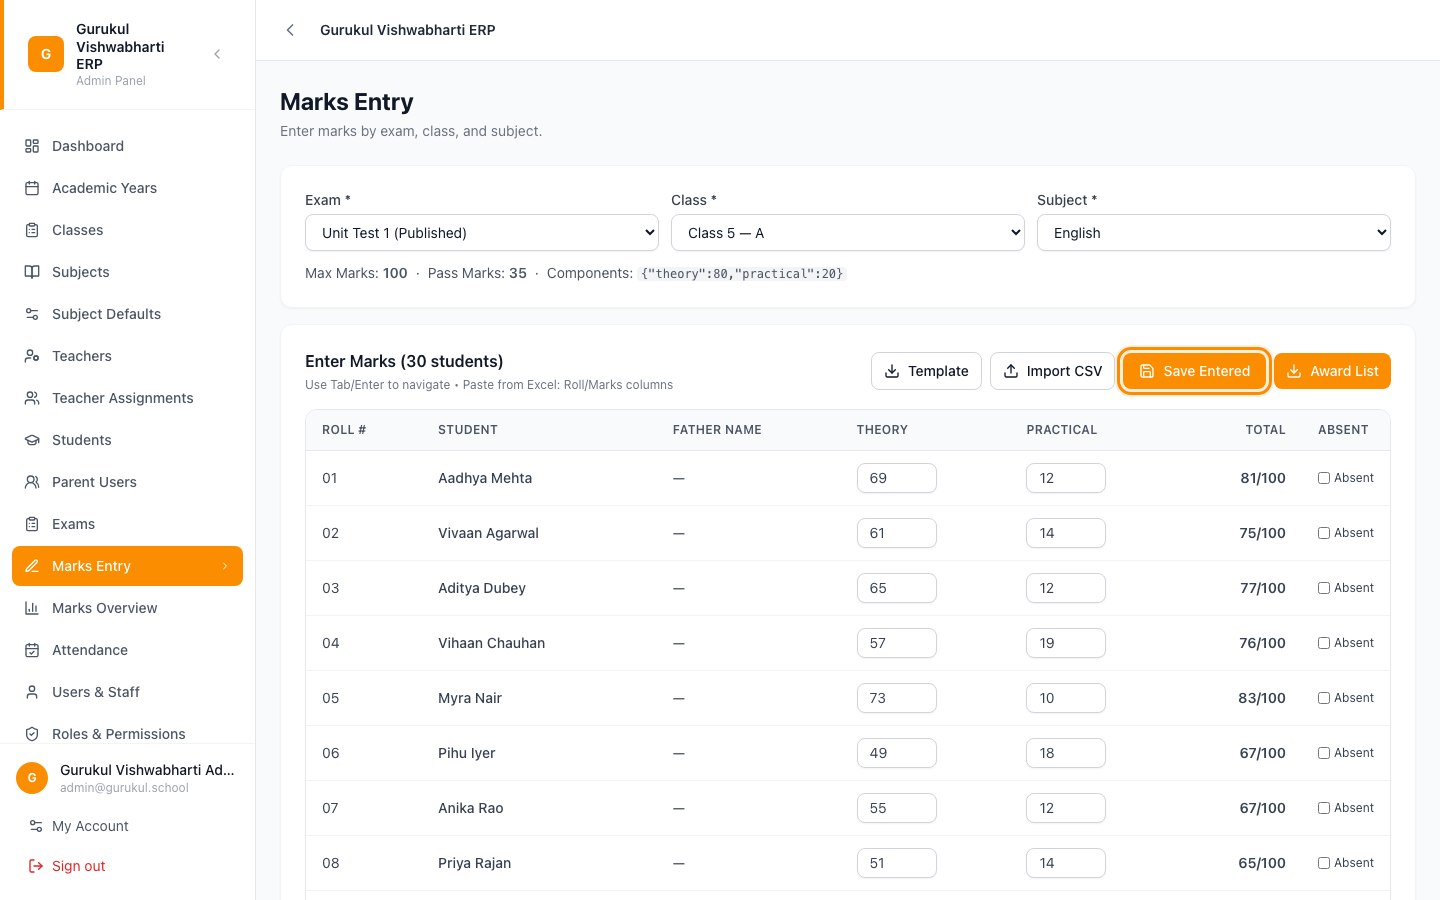
Click Save Entered — it saves only the students who actually have something entered or are marked absent, so you can save partway through and come back later without affecting anyone else's row. Award List downloads an Excel sheet (roll number, name, father's name, marks, grade) for the class/subject you're viewing, useful for notice-board printing.
Step 5 — Publish the exam
Once every subject for every assigned class has marks entered, go back to Exams (or the exam's Setup page) and click Publish — the setup page's button is labelled Publish Results. This is what makes results visible to parents and in Marks Overview.
If you find a mistake after publishing, Unpublish and fix it — this doesn't erase any marks, it only hides the exam from parents again until you republish.
What to do next
Once results are in, Marks Overview gives you the class-wide picture — totals, percentages, and pass/fail calculated automatically from your grading scale, with an export to Excel. If this is a recurring exam type (a monthly unit test, say), use Duplicate on the Exams list next time rather than repeating this whole setup — it copies the class assignments and subject configuration, leaving only the dates and marks to redo.
Common problems
A teacher can't see a class or subject in Marks Entry. Check Teacher Assignments — they only see what they're assigned to, not everything in the school.
Subject doesn't show up when setting an override. The subject isn't assigned to that class yet — fix that from Subjects first.
"Pass marks cannot be greater than total marks." Exactly what it says — lower the pass marks or raise the total in Step 3.
A student is missing from the marks table entirely. They're not in the class you assigned to the exam in Step 2, or not in that class in Students at all — check there first. If the subject is an elective, they may simply not be enrolled in it: use the Electives tab of the class in Classes to add them.
Features covered
Exams
Create an exam — Unit Test, Half-Yearly, Final — with a marks due date, choose its classes and set max marks, pass marks and a theory/practical split per subject, for every class or just one. Opening marks entry tells each teacher which sheets are theirs; the exam page shows what's left and who owns it, and reminds teachers in one tap. An elective is counted against the students enrolled in it, so a sheet is never short of students who do not take the subject. Publishing shows a checklist first and can be undone.
Marks Entry
Teachers see their own sheets with what's done and what's due, and enter marks for each part of the split — blanks stay blank, absent is marked AB. On the phone a number keypad moves from student to student, unsaved marks survive closing the app, and the next sheet opens when one is done. On the web, an elective's sheet lists only the students who take it.
Subjects
Manage each subject on one page: its name and code, how it is marked, the classes that study it and the exams it is in. Mark a subject as an elective in a class and only the students enrolled in it are scored, counted and asked for marks.
Want us to set this up with you?
Data migration and staff training are included on every plan.
Talk to us